Steem has been designed to be easy to use. The following walkthrough applies to both the
Windows and Linux versions, though the pictures are from Windows.
Step 1
Make a folder for Steem to live in. For example, C:\Steem.
Step 2
Now download the TOS and Steem archive files from the Steem website.
Step 3
Extract their contents to C:\Steem.
Step 4
Run the executable file. Steem will present
some welcome messages, which you should read, and ask you to choose a TOS
file. Select TOS 1.02 from the list.
Step 5
You could also make a folder called hd in the Steem
folder for the ST's emulated hard disk. If you do, choose it when Steem
asks you for a path for hard drive C:. You can always change this later.
Step 6
Steem's main window will appear. Click on the play icon
()
to start emulation.
Step 7
You should get to the ST desktop. Press Shift+Pause/Break on your keyboard to stop emulation.
Step 8
At this point you might think it is time to insert
one of your ST disks into drive A: and run it. This won't work, because
Steem doesn't allow direct access to the PC's floppy drive. Why not?
The reason is that, while ST disks and MS-DOS disks are basically compatible,
most disks on the ST were nonstandardly formatted in order to squeeze more
onto them. Unfortunately most PC disk controllers can't read these extended
formats. You can use Windows Explorer to copy the contents of any PC-readable
ST disk to your ST hard-drive folder, eg. C:\Steem\hd. More info on
using disks is in the "faq.txt" which comes with Steem.
Step 9
Instead of accessing the PC floppy drive, Steem uses
files called "disk images" which contain all the contents of an ST disk.
These are available from many sources, or you can make your own (see
the "disk image howto.txt" which comes with Steem). To find disk images
on the net, go to Steem's links page,
where there is a long list of sources.
The Automation list by Chris Edgar
has hundreds of games cracked by Automation and is a good place to start.
Step 10
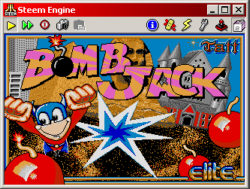
Pick a disk image from the list and save it to your
Steem folder. I've chosen A_016.ST containing the classic game Bombjack.
Step 11
Go back to Steem and click on the Disk Manager icon
().
In the Disk Manager, drag A_016 to the drive A box.
Step 12
Go back to the main Steem window, click on the reset
icon () and then run by clicking on play
().
After working through the crackers' menu (press 5, then n), Bombjack
should appear.
Step 13
To play the game you'll need to use a joystick. If you have a PC joystick installed
Steem will use that as the main ST joystick. If you don't have a PC joystick then Steem
will use the cursor keys and the control key as the main joystick when scroll lock
is on.
You may wonder why you need to press scroll lock to enable a joystick, well there is a
good reason. If a key, say A, is being used to control a joystick direction or the fire
button then it cannot be used as a normal key. For instance, if your name was Andy and
you tried to type that in when you got a high score, all that would come out is "ndy".
If you aren't happy with the defaults go to the joystick dialog to change them as your
heart desires. Just click on the box that you want to change so it lights up and press
any key, joystick button or joystick axis to select that as the input. You can even click
on the box with the middle mouse button to select that, although it isn't very useful
for joysticks!
That's It
You should now have Steem up and running. It's a good idea at this point to have a look
at the FAQ page which describes
some common problems you might encounter while running Steem and their
solutions. For a full description of all the options available in Steem, see
the readme.txt which comes with Steem (accessible via the button in the main Steem window).
This guide is games-oriented, if you want to use applications there is further information
for setting up Steem on the great
Tim's Atari MIDI World website.
If you have any further problems or queries, or you have any comments about
Steem, you can
e-mail us.

 )
to start emulation.
)
to start emulation.
 ).
In the Disk Manager, drag A_016 to the drive A box.
).
In the Disk Manager, drag A_016 to the drive A box.

 ) and then run by clicking on play
(
) and then run by clicking on play
(